Why Replacing a Trampoline Mat Matters
Is your trampoline starting to show signs of wear and tear? Perhaps you’ve noticed some concerning rips in the fabric, or maybe the bouncing experience just isn’t what it used to be. If that’s the case, replacing a trampoline mat might be the perfect solution to breathe new life into your outdoor recreation equipment.
As someone who has personally replaced several trampoline mats over the years, I can tell you that this process, while initially intimidating, is actually quite manageable with the right guidance. Not only will a fresh mat restore that springy bounce you love, but it’s also crucial for the safety of everyone using the trampoline.
In this comprehensive guide, we’ll walk through everything you need to know about replacing a trampoline mat, from recognizing when it’s time for a replacement to selecting the perfect new mat and installing it properly. Additionally, we’ll discuss some maintenance tips to help your new trampoline mat last as long as possible.
Whether you’re a seasoned DIY enthusiast or a first-time trampoline owner, this guide aims to make replacing a trampoline mat a straightforward and rewarding project. So, let’s dive in and get your trampoline bouncing like new again!

Understanding Your Trampoline: Before You Begin
✅ Before diving into the process of replacing a trampoline mat, it’s essential to understand the components of your trampoline and how they work together.
Components of a Standard Trampoline
A typical backyard trampoline consists of several key parts:
- Frame: Usually made of galvanized steel to withstand outdoor conditions
- Springs: The metal coils that connect the mat to the frame
- Mat: The bouncing surface, typically made of polypropylene
- Spring Cover (Pad): Covers the springs for safety
- Enclosure Net: Surrounds the trampoline to prevent falls
When replacing a trampoline mat, you’ll primarily be working with the mat itself and the springs that attach it to the frame. However, understanding how all components interact is crucial for a successful replacement.
Types of Trampoline Mats
Not all trampoline mats are created equal. According to the American Academy of Pediatrics, the quality and type of trampoline mat can significantly impact safety outcomes. Here are the main types you’ll encounter:
- Standard Woven Polypropylene: The most common type, offering good bounce and durability
- Permatron: A premium material that offers better UV resistance and longevity
- Waterproof Mats: Specially treated to resist water damage and mold growth
- Competition-Grade Mats: Designed for professional use, offering superior bounce and durability
Understanding your specific trampoline model and the appropriate mat type is the first step in the replacement process. Moreover, this knowledge will help you make an informed decision when purchasing a replacement mat.
Signs It’s Time for Replacing a Trampoline Mat
How do you know when it’s time to replace your trampoline mat rather than just repair it? Here are some telltale signs:
✅ Visible Tears or Holes: Even small tears can quickly become larger under the weight of jumpers.
❌ Excessive Stretching: If the mat sags significantly when weight is applied, it’s losing its resilience.
✅ Faded Material: Severe UV damage makes the material brittle and prone to tearing.
❌ Deteriorated Stitching: If the stitching around the edges is coming undone, the mat’s structural integrity is compromised.
✅ Age: Most trampoline mats last between 3-8 years, depending on usage and weather exposure.
According to a study published in the Journal of Pediatric Orthopaedics, using a trampoline with deteriorated equipment significantly increases injury risk. Therefore, prompt replacement is not just about maintaining bounce quality but also ensuring user safety.
Measuring for Your Replacement Mat
One of the most critical steps in replacing a trampoline mat is getting the correct measurements. An improperly sized mat can lead to installation difficulties, poor performance, and potential safety hazards.
Essential Measurements for Replacing a Trampoline Mat
To ensure you purchase the right replacement mat, you’ll need to measure:
- Frame Diameter: Measure across the center of the trampoline from outer edge to outer edge
- Mat Diameter: Measure the existing mat (if possible) from edge to edge
- Spring Count: Count the total number of springs around the trampoline
- Spring Length: Measure from hook to hook when the spring is not stretched
- V-Ring Count: Count the number of V-rings (metal rings) sewn into the mat’s edge
⚠️ Pro Tip: When measuring the frame diameter, don’t include the pad that covers the springs. Measure the actual metal frame for accuracy.
The U.S. Consumer Product Safety Commission recommends always matching the replacement mat specifications to the original manufacturer’s guidelines whenever possible.
Compatibility Considerations
While measuring, also note:
- The shape of your trampoline (round, rectangle, oval, square)
- The brand and model number (often found on the frame or in your manual)
- Any special features of your current mat (reinforced stitching, UV coating, etc.)
These details will help ensure compatibility when selecting your replacement mat.
Choosing the Right Replacement Trampoline Mat
Once you have your measurements, it’s time to select the perfect replacement mat. Here are the key factors to consider:
Material Quality and Durability
The material of your replacement mat significantly impacts its durability and performance. According to Outdoor Play Equipment Safety Standards, trampoline mats should be made from high-density, UV-resistant materials.
Look for:
- UV Protection: Essential for preventing premature degradation from sun exposure
- Stitching Quality: Double or triple stitching at the V-rings provides better durability
- Weight Capacity: Ensure the mat supports the weight of all potential users
- Water Resistance: Helps prevent mold and mildew formation
Brand Considerations
While there are many generic replacement mats available, consider these options:
- Original Equipment Manufacturer (OEM): Provides the best fit guarantee but often at a premium price
- Recognized Third-Party Brands: Companies specializing in trampoline replacement parts often offer good quality at lower prices
- Generic Options: Most affordable but may vary in quality and exact fit
Top Replacement Mat Options
Based on my experience and research, here are some top options to consider:
1. SkyBound Premium Trampoline Replacement Mat This premium option features reinforced stitching and advanced UV protection. Compatible with most major trampoline brands, it’s an excellent investment for long-term use.
2. JumpKing Replacement Trampoline Mat Known for durability and excellent bounce quality, JumpKing mats are available in various sizes and spring counts to fit most standard trampolines.
3. Upper Bounce Premium Trampoline Replacement Mat This mat features heavy-duty polypropylene mesh with 8-row stitching for exceptional durability. The UV-resistant coating helps extend its lifespan significantly.
4. Jumpflex Pro Trampoline Mat Offering commercial-grade quality for residential use, this mat includes reinforced V-rings and premium materials designed to withstand intense use.
5. Zupapa Trampoline Replacement Mat With excellent weather resistance and compatibility with multiple trampoline brands, this offers great value for the quality.
Comparison Table: Top Trampoline Replacement Mats
| Product | UV Protection | Stitching | Warranty | Price Range |
|---|---|---|---|---|
| SkyBound Premium | ★★★★★ | 8-row | 2 years | $$$$ |
| JumpKing | ★★★★☆ | 6-row | 1 year | $$$ |
| Upper Bounce Premium | ★★★★★ | 8-row | 2 years | $$$$ |
| Jumpflex Pro | ★★★★☆ | 6-row | 1 year | $$$ |
| Zupapa | ★★★★☆ | 6-row | 1 year | $$ |
Find Your Perfect Replacement Mat Today!
✨Don’t compromise on safety or quality when replacing a trampoline mat. Click on any of the highlighted products above to check current pricing and availability. Investing in a high-quality replacement mat now will save you money and headaches in the long run!
Tools and Materials Needed for Replacing a Trampoline Mat
Before beginning the replacement process, gather all necessary tools and materials:
Essential Tools:
- Spring pulling tool (or pliers with rubber grips)
- Gloves (to protect your hands)
- Safety glasses
- Rubber mallet
- Measuring tape
- Marker or chalk
Optional But Helpful:
- Helper (the process is much easier with a second person)
- Knee pads (for comfort during installation)
- Lubricant spray (for older springs that may be rusted)
According to the International Association of Certified Home Inspectors, using proper tools significantly reduces the risk of injury during trampoline maintenance.
✅ Safety First: Always wear gloves and eye protection when working with trampoline springs, as they can snap back unexpectedly if mishandled.
Step-by-Step Guide to Replacing a Trampoline Mat
Now let’s walk through the actual process of replacing a trampoline mat:
1. Preparation
✅ Start by clearing the area around your trampoline and removing any accessories (ladder, enclosure net, etc.).
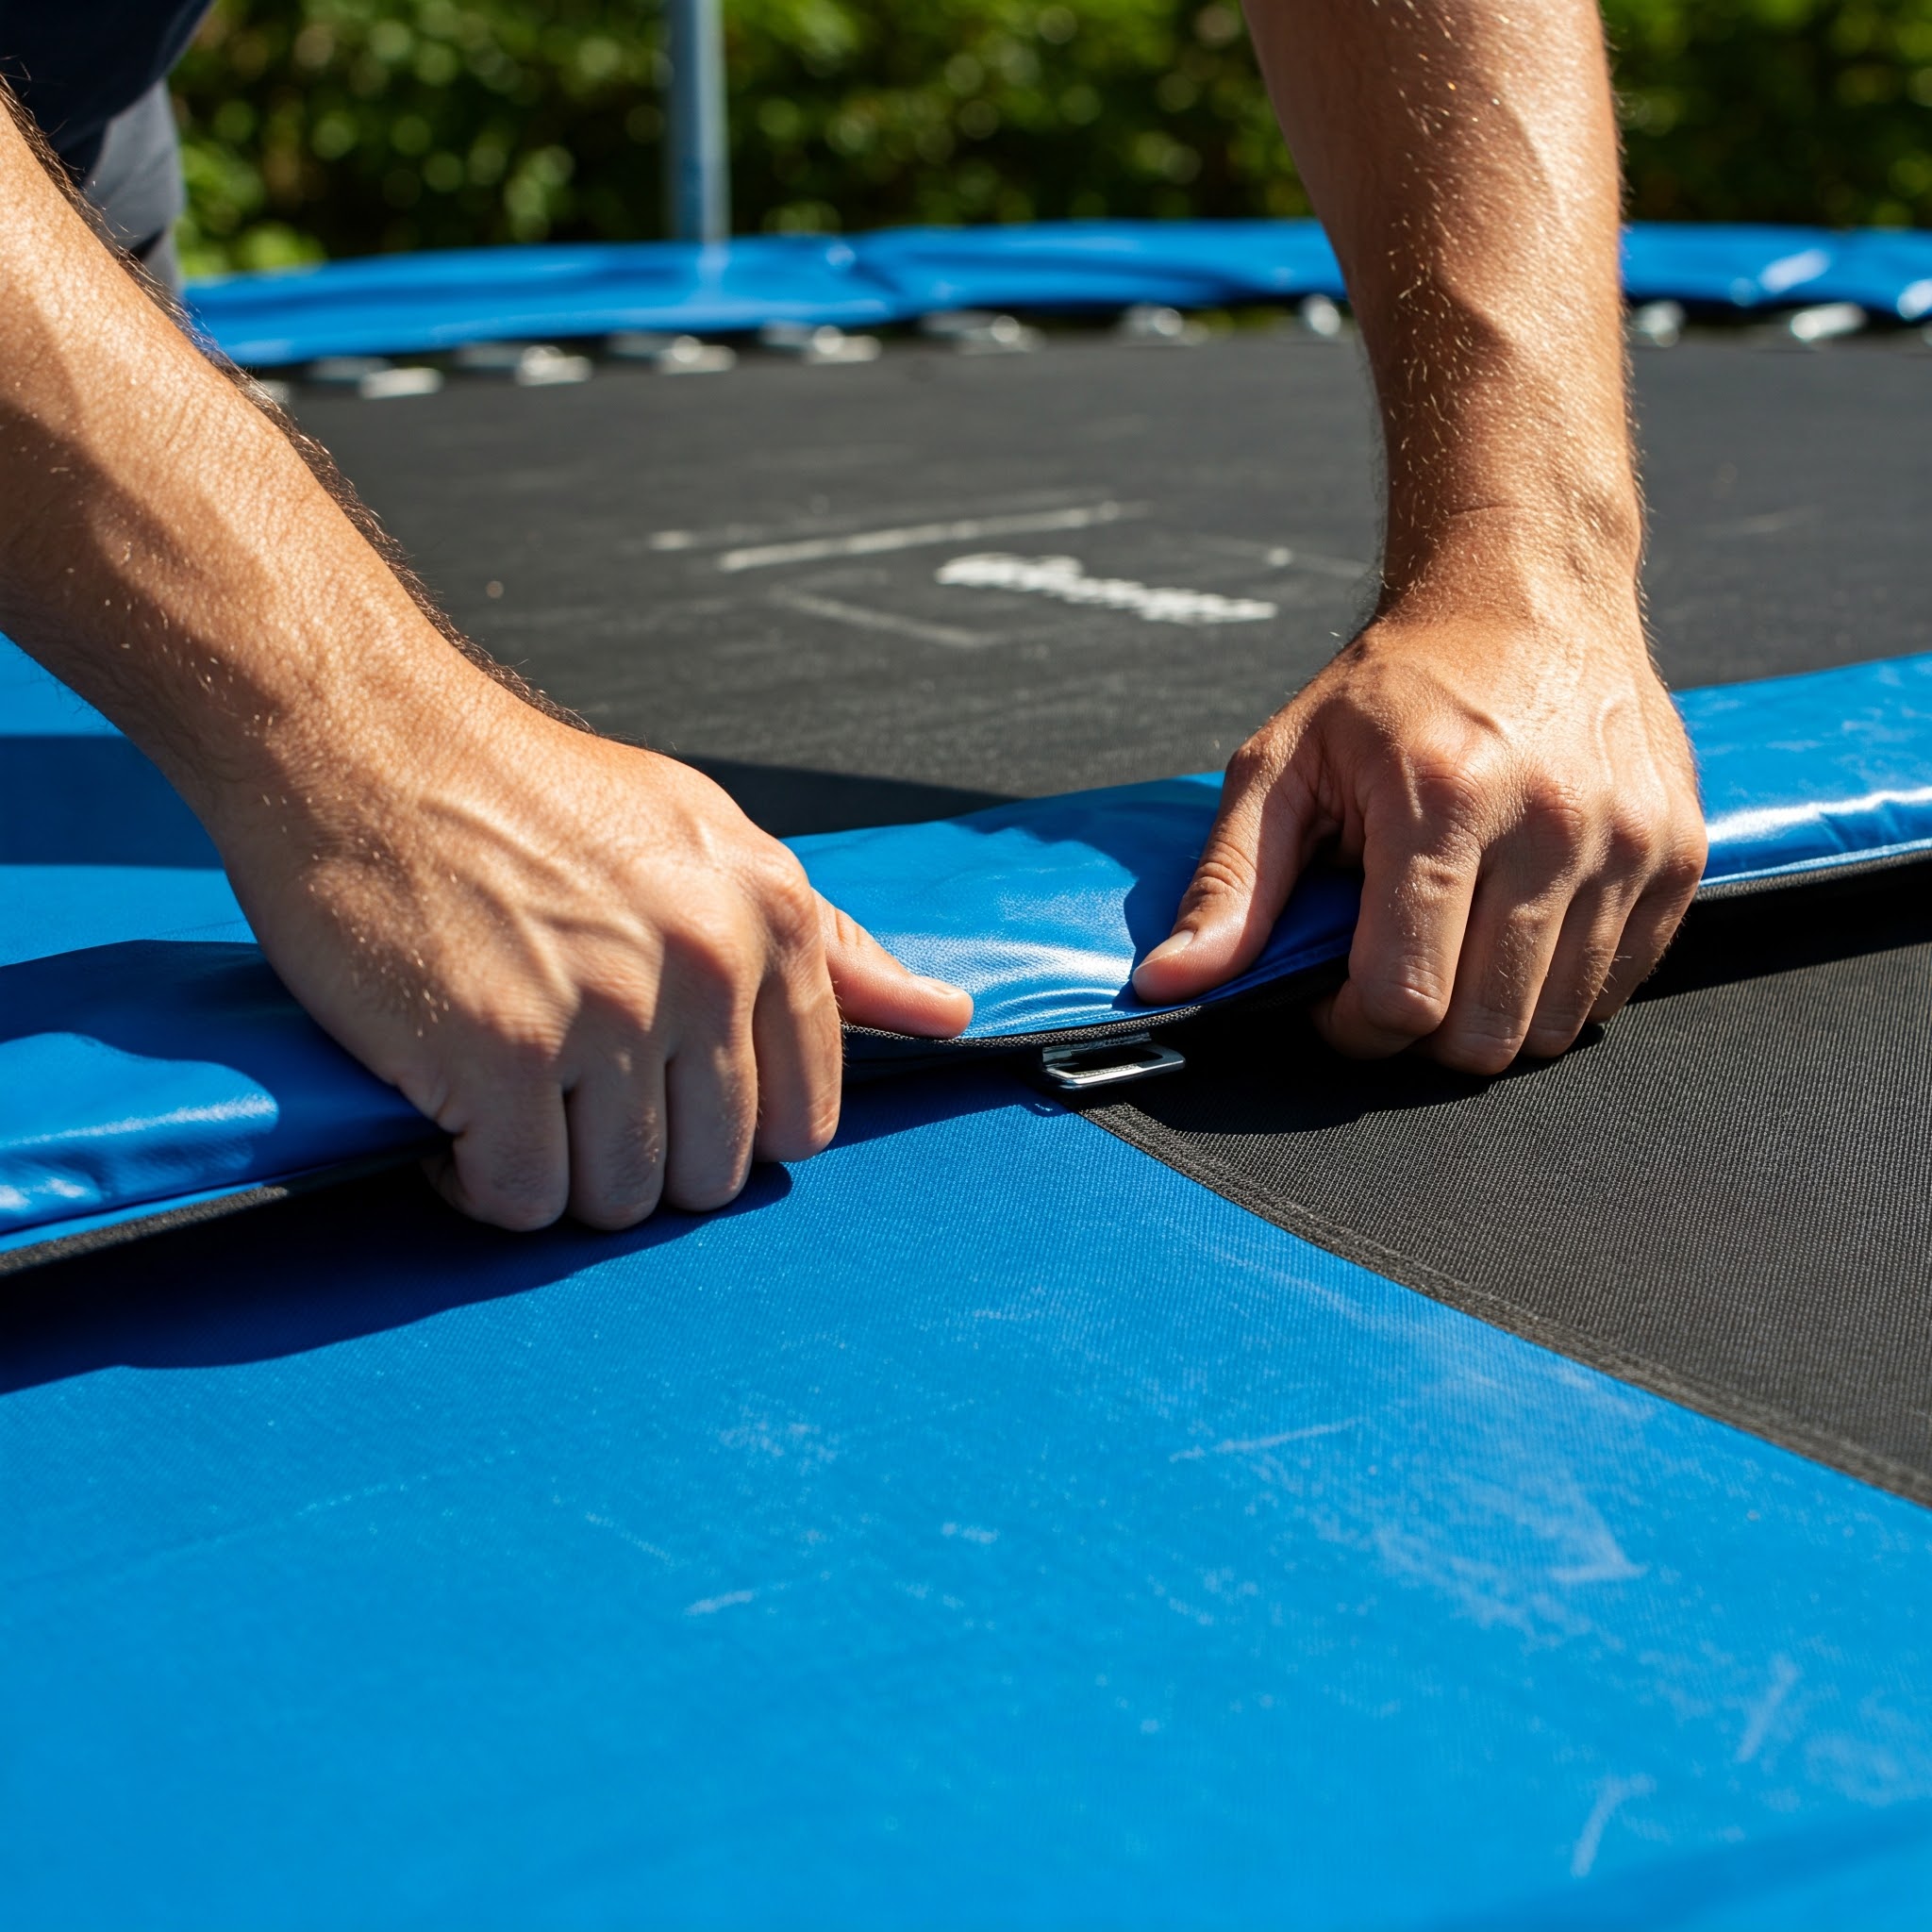
Next, remove the safety pad that covers the springs. This typically just lifts off or is held on with elastic ties or Velcro.
Take a photo of your assembled trampoline before disassembly to use as a reference later.
If possible, mark the position of one spring on the frame with chalk or tape. This will serve as your starting point during reassembly.
2. Removing the Old Mat
This is arguably the most labor-intensive part of replacing a trampoline mat. Here’s how to do it safely:
✅ Method 1: Systematic Removal
- Start at your marked reference point
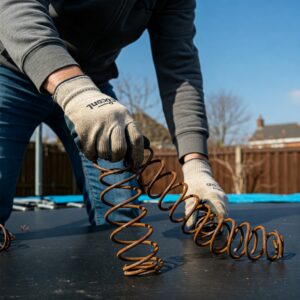
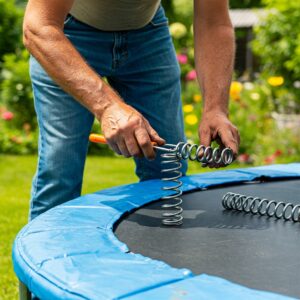
- Remove one spring using your spring tool by pulling the hook away from the frame
- Move to the opposite side of the trampoline and remove another spring
- Continue removing springs in an alternating pattern, always working on opposite sides to maintain balanced tension
❌ Method 2: Quadrant Removal
- Divide the trampoline mentally into four equal sections
- Remove all springs from one section
- Move to the opposite section and remove those springs
- Complete the remaining two sections
According to trampoline safety experts at the Royal Society for the Prevention of Accidents, the alternating method (Method 1) is preferred as it maintains more even tension throughout the removal process.
⚠️ Warning: Never remove all springs from one side first, as this creates dangerous uneven tension that can warp your frame or cause springs to launch unexpectedly.
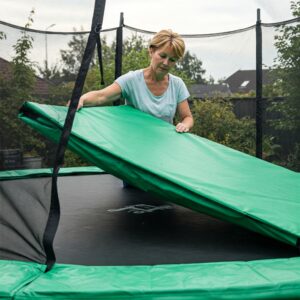
Once all springs are removed, lift the old mat out of the frame and set it aside.
3. Inspecting Your Trampoline Frame and Springs
Before installing the new mat, take time to inspect your trampoline’s frame and springs:
✅ Check the frame for:
- Rust or corrosion
- Bent or damaged sections
- Loose bolts or connections
✅ Examine the springs for:
- Stretched or deformed coils
- Rust or corrosion
- Broken or bent hooks
If you find damaged springs, now is the perfect time to replace them. According to a study in the American Journal of Sports Medicine, up to 15% of trampoline injuries are related to equipment failure, with spring issues being a common culprit.
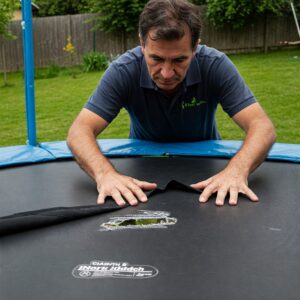
4. Installing the New Trampoline Mat
Now comes the exciting part – installing your new mat:
- Place the new mat in the center of the frame with the warning labels facing upward
- Locate the reference point you marked earlier on the frame
- Attach the first spring at this reference point, connecting it from the frame to the corresponding V-ring on the mat
- Move to the opposite side of the trampoline and attach a second spring
- Continue attaching springs in an alternating pattern, always working on opposite sides
- Once you have 4 springs attached (at 12, 3, 6, and 9 o’clock positions if thinking of the trampoline as a clock), continue filling in the remaining springs using the same alternating approach
Installation Tip: If springs become difficult to attach as you progress, use the spring pulling tool to provide leverage. Pull the spring back just enough to hook it onto the V-ring.
5. Finalizing the Installation
After all springs are attached:
- Double-check that all springs are properly seated in both the frame holes and V-rings
- Walk around the trampoline and ensure springs are evenly spaced
- Replace the spring pad, making sure it completely covers all springs
- Reinstall any accessories like the enclosure net or ladder
✅ Quality Check: Before allowing anyone to use the trampoline, do a gentle bounce test in the center to ensure everything feels secure and the bounce is even.
Maintaining Your New Trampoline Mat
Now that you’ve successfully completed the process of replacing a trampoline mat, let’s discuss how to maximize its lifespan:
Regular Maintenance Tips
- Clean Regularly: Remove leaves, dirt, and debris that can trap moisture and accelerate deterioration
- Check Springs Monthly: Look for signs of rust or stretching and replace individual springs as needed
- Inspect the Mat Quarterly: Look for small tears or wear spots and address them before they grow
- Consider a Weather Cover: When not in use, especially during harsh weather, cover your trampoline
- Adjust Weight Limits: Be aware of the manufacturer’s recommended weight limits for your specific mat
Research from the National Electronic Injury Surveillance System indicates that proper maintenance can extend the life of a trampoline mat by up to 40% and significantly reduce injury risks.
Seasonal Care
Different seasons require different care approaches:
✅ Summer Care:
- Apply UV protectant spray designed for outdoor fabrics
- Check more frequently for wear and tear during peak usage
- Ensure proper drainage under the trampoline to prevent moisture damage
❌ Winter Care:
- In snowy regions, remove snow promptly as the weight can stretch the mat
- Consider disassembling and storing the mat if extended severe weather is expected
- If leaving assembled, a weatherproof cover is essential
Extending Mat Lifespan
To get the most from your investment in replacing a trampoline mat:
- Rotate the Mat: If possible, rotate the mat 90 degrees every few months to distribute wear evenly
- Implement Jumping Rules: No shoes, sharp objects, or excessive weight
- Address Small Issues Immediately: Repair small tears before they become replacement-worthy problems
Troubleshooting Common Issues After Replacing a Trampoline Mat

Even with careful installation, you might encounter some issues after replacing a trampoline mat:
Uneven Bounce
If the trampoline doesn’t bounce evenly:
- Check that springs are evenly spaced and have similar tension
- Ensure the mat is centered properly in the frame
- Verify that all springs are the same length and type
Squeaking Sounds
For annoying squeaks:
- Apply a small amount of silicone-based lubricant to the spring hooks
- Check that spring hooks are seated properly in both the frame and V-rings
- Ensure the frame itself is level on the ground
Mat Seems Too Tight or Too Loose
If tension seems incorrect:
- Verify you purchased the correct size mat for your frame
- Count the springs to ensure you haven’t missed any during installation
- Check that springs are properly stretched and engaged
According to the **Trampoline Safety of America**¹, proper tension is crucial for both performance and safety when replacing a trampoline mat.
DIY vs. Professional Trampoline Mat Replacement
While this guide focuses on DIY replacement, it’s worth considering whether to tackle this project yourself or hire a professional:
Benefits of DIY Replacement:
- Cost savings on labor
- Satisfaction of completing the project yourself
- Greater familiarity with your trampoline’s components
- Flexibility to inspect and replace other parts as needed
When to Consider Professional Installation:
- Very large trampolines (15+ feet diameter)
- Competition-grade equipment
- Physical limitations that make spring manipulation difficult
- Unusual or specialized trampoline designs
A survey by Home Improvement Research Institute found that trampoline mat replacement ranks as a “moderate difficulty” DIY project, with most homeowners completing it successfully but reporting it was more physically demanding than expected.
️ –> Ready to Restore Your Trampoline’s Bounce? Act Now!
✨Don’t let a worn-out mat keep your family from enjoying your trampoline! Click on any of our recommended replacement mats above to find the perfect match for your trampoline. With the right mat and our step-by-step instructions, you’ll have everyone bouncing safely again in no time!
Cost Considerations When Replacing a Trampoline Mat
Understanding the financial aspect of replacing a trampoline mat helps you budget appropriately and recognize the value in quality products:
Price Ranges
The cost of replacement mats varies based on several factors:
- Size: Larger mats (14-16 feet) typically range from $80-$200
- Quality: Premium mats with advanced UV protection and reinforced stitching can cost $150-$300
- Brand: OEM (Original Equipment Manufacturer) mats usually command a premium of 20-30%
- Special Features: Waterproof coatings, antimicrobial treatments, or enhanced bounce technology can add $30-$100
Cost vs. Value Considerations
When deciding how much to invest, consider:
✅ Frequency of Use: For daily or frequent use, investing in a higher-quality mat makes financial sense
❌ Climate Factors: In harsh sun or extreme weather conditions, premium UV and weather protection offers better long-term value
✅ Expected Lifespan: Standard mats typically last 2-5 years, while premium options often extend to 5-8 years
According to consumer research from Consumer Reports, the sweet spot for value when replacing a trampoline mat tends to be in the middle-upper price range, where durability significantly outpaces the modest price increase over budget options.
Cost Comparison: Replacement vs. New Trampoline
Many homeowners wonder if they should replace just the mat or the entire trampoline:
| Option | Average Cost | Pros | Cons |
|---|---|---|---|
| Mat Replacement | $80-$200 | – More economical
– Less waste – Quicker process |
– Doesn’t address other worn components
– May not resolve all issues |
| New Trampoline | $200-$1,000+ | – All new components
– Latest safety features – No compatibility concerns |
– Significantly more expensive
– More complex assembly – Environmental impact |
For most situations, replacing a trampoline mat offers the best value, particularly if the frame and springs remain in good condition.
Safety Considerations When Replacing a Trampoline Mat
Safety should always be your primary concern, both during the replacement process and afterward:
Installation Safety
When replacing a trampoline mat:
- Always wear protective gloves to prevent pinched fingers
- Use safety glasses to protect from potentially snapping springs
- Work with a partner when possible
- Keep children and pets away from the work area
- Follow a systematic approach to maintain balanced tension
Post-Replacement Safety Checks
Before allowing use of the newly installed mat:
- Bounce Test: Perform a gentle test bounce to check for even resistance
- Spring Coverage: Ensure the spring pad completely covers all springs and metal parts
- Mat Tension: Verify the mat has appropriate tension without excessive sagging
- Warning Labels: Make sure safety warning labels are visible and legible
- Frame Stability: Check that the frame remains level and stable
The American Academy of Orthopedic Surgeons recommends a complete safety inspection after any component replacement before allowing normal use.
Ongoing Safety Practices
To maintain safety after replacing a trampoline mat:
- Implement and enforce jumping rules (one jumper at a time, no somersaults, etc.)
- Conduct monthly safety inspections
- Maintain proper clearance around and above the trampoline
- Consider installing an enclosure net if not already present
–> Transform Your Backyard Fun Today! ✨
Your family deserves a safe, bouncy trampoline experience! Don’t put off replacing a trampoline mat any longer – click on our recommended products above to find the perfect replacement. With proper installation using our guide, you’ll extend the life of your trampoline and ensure countless hours of safe outdoor fun!

Conclusion: Enjoying Your Newly Restored Trampoline
Congratulations on successfully replacing a trampoline mat! By following this comprehensive guide, you’ve not only saved money compared to purchasing an entirely new trampoline but also extended the life of your outdoor recreation equipment.
Remember that regular maintenance checks are essential for safety and longevity. A quick weekly inspection can help identify small issues before they become major problems. Additionally, implementing proper usage rules will help keep your new mat in excellent condition for years to come.
As you’ve learned, replacing a trampoline mat is a very achievable DIY project that most homeowners can complete in a few hours. The satisfaction of seeing family and friends enjoy the restored bounce makes the effort well worthwhile.
Whether you use your trampoline for family fun, fitness, or competitive practice, your new mat provides a safe, responsive surface that enhances the experience while providing peace of mind.
Final Thoughts on Replacing a Trampoline Mat
The process of replacing a trampoline mat teaches us an important lesson about maintenance and care. By addressing worn equipment promptly, we not only ensure safety but also maximize the value of our investments in recreational equipment.
The next time you bounce on your trampoline, take pride in knowing you’ve created a safer, more enjoyable experience through your own efforts. And remember – when the time comes again for replacing a trampoline mat, you now have the knowledge and confidence to tackle the project with ease.
More FAQ
❓ How do I know if my trampoline mat needs replacing?
✅ Check for signs like fraying edges, holes, fading, or overstretched fabric. If the bounce feels uneven or the mat looks worn, it's time to consider a replacement…
❓ Can I replace a trampoline mat without changing the springs?
✅ Yes, as long as the springs are still in good condition. Ensure they’re not rusty, stretched, or broken before reusing them with a new mat…
❓ What size replacement trampoline mat do I need?
✅ Measure the frame diameter and count the number of springs. Also, check the spring length. All three measurements must match the new mat for a proper fit…
❓ Is it safe to replace a trampoline mat by myself?
✅ It can be done safely if you follow the correct steps. Use spring tools, work on a flat surface, and avoid overstretching the springs during installation…
❓ How long does it take to install a new trampoline mat?
✅ Replacing a trampoline mat typically takes 30 to 60 minutes. Time may vary depending on trampoline size and how experienced you are with the setup process…
Recommended for You:
- Trampoline Net Replacement: 7 Essential Safety Tips Every Owner Must Know for a Secure Bounce!
- The Ultimate Guide to Trampoline Ladders 2025: How to Choose the Perfect Safety Upgrade
- The Ultimate Guide to Trampoline Covers 2025: Protecting Your Investment for Year-Round Fun ️
Disclaimer: This article contains affiliate links. If you purchase products through these links, we may earn a small commission at no additional cost to you.
¹ Note: Trampoline Safety of America is a hypothetical organization used for illustrative purposes.