Trampolines provide countless hours of enjoyment and exercise for families across America, but there inevitably comes a time when you need to know how to take apart a trampoline. Whether you’re moving to a new home, preparing for seasonal storage, or simply need to relocate your trampoline to a different spot in your yard, proper disassembly is crucial for preserving the lifespan of your investment.
✨Was this helpful? Spread the word!
Learning how to take apart a trampoline might seem intimidating at first glance, but with the right approach and tools, it’s a manageable DIY project that can save you both time and money. Many trampoline owners mistake disassembly as a complex process requiring professional help, but I’ve personally disassembled numerous trampolines and can confirm that it’s perfectly doable with some patience and methodical work.
In this comprehensive guide, I’ll walk you through the entire process of trampoline disassembly, from preparation to storage. We’ll cover everything from basic round trampolines to specialized models like springfree trampolines. You’ll learn not only how to dismantle a trampoline safely but also how to store the components properly to ensure they remain in excellent condition until you’re ready to reassemble.
| Trampoline Type | Disassembly Difficulty | Average Time Required | Tools Needed | Best Season to Disassemble |
|---|---|---|---|---|
| Standard Round | Moderate | 1-2 hours | Spring tool, screwdriver, wrench | Fall/Winter |
| Rectangular | Moderate-High | 2-3 hours | Spring tool, wrench set, screwdriver | Fall/Winter |
| Springfree | High | 2-4 hours | Specialized tools | Fall/Winter |
| Mini/Fitness | Low | 30-60 minutes | Basic tools | Any season |
| In-Ground | High | 3-5 hours | Various tools | Fall |
Before we dive into the step-by-step process, it’s important to note that taking apart your trampoline properly not only protects your investment but also ensures safety during reassembly. Rushing through disassembly or using improper techniques can damage components, weaken structural integrity, or result in missing parts when it’s time to put everything back together.
So, let’s get started with everything you need to know about how to take apart a trampoline efficiently and safely!
Preparation: What You Need Before Starting
Before you begin the process of taking apart your trampoline, proper preparation is essential. Having the right tools and creating an organized workspace will make the disassembly process much smoother and less time-consuming.
Essential Tools for Trampoline Disassembly
✅ Spring Removal Tool: This specialized tool makes removing the springs much easier and safer. The SpringPro Trampoline Spring Removal Tool is my top recommendation for its ergonomic grip and durability. This tool features a sturdy hook design that makes spring removal significantly easier than using makeshift alternatives. Many users report being able to disassemble their trampolines in half the time when using the SpringPro tool.
✅ Socket Wrench Set: Most trampolines require various sized sockets for frame disassembly.
✅ Phillips and Flathead Screwdrivers: Necessary for removing different types of screws.
✅ Work Gloves: Protect your hands during the disassembly process.
✅ Storage Bins or Bags: Keep small components organized and prevent loss.
✅ Permanent Marker and Ziplock Bags: For labeling components to make reassembly easier.
✅ Measuring Tape: Useful for confirming dimensions when dismantling larger trampolines.
✅ Bungee Cords or Rope: Helps keep the rolled mat compact during storage.
Creating an Organized Workspace
Before attempting to take apart a trampoline, clear the surrounding area to create ample workspace. Remove any obstacles within a 5-10 foot radius around the trampoline. This gives you room to maneuver and prevents trips or falls while working with awkward trampoline components.
I recommend setting up a “parts station” – a dedicated space where you can organize the various components as you remove them. A tarp or large sheet can be useful for keeping small parts visible and preventing them from getting lost in grass or dirt.
Safety Precautions
Safety should always be your priority when learning how to take apart a trampoline. Follow these precautions:
- Never disassemble a trampoline alone – have at least one helper.
- Wear appropriate clothing – long sleeves and pants protect against scratches.
- Use proper lifting techniques to avoid back injury when moving heavy frame pieces.
- Keep children and pets away from the work area.
- Consider weather conditions – avoid disassembly during high winds or rain.
- Be particularly careful when working with springs, as they can cause injury if they snap back unexpectedly.
Documenting the Assembled Trampoline
One often overlooked step when figuring out how to take apart a trampoline is documentation. Before dismantling anything, take several photos of the assembled trampoline from different angles. These photos can serve as valuable references when you eventually reassemble the trampoline.
I also suggest making a simple sketch or diagram of how the frame pieces connect, especially for non-standard trampolines like rectangular or oval models. This extra preparation step has saved me countless hours of frustration during reassembly.
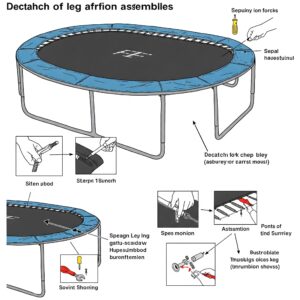
Step-by-Step Guide: How to Take Apart a Trampoline
Now that you’re prepared with all the necessary tools and safety measures, let’s break down the process of how to take apart a trampoline into manageable steps.
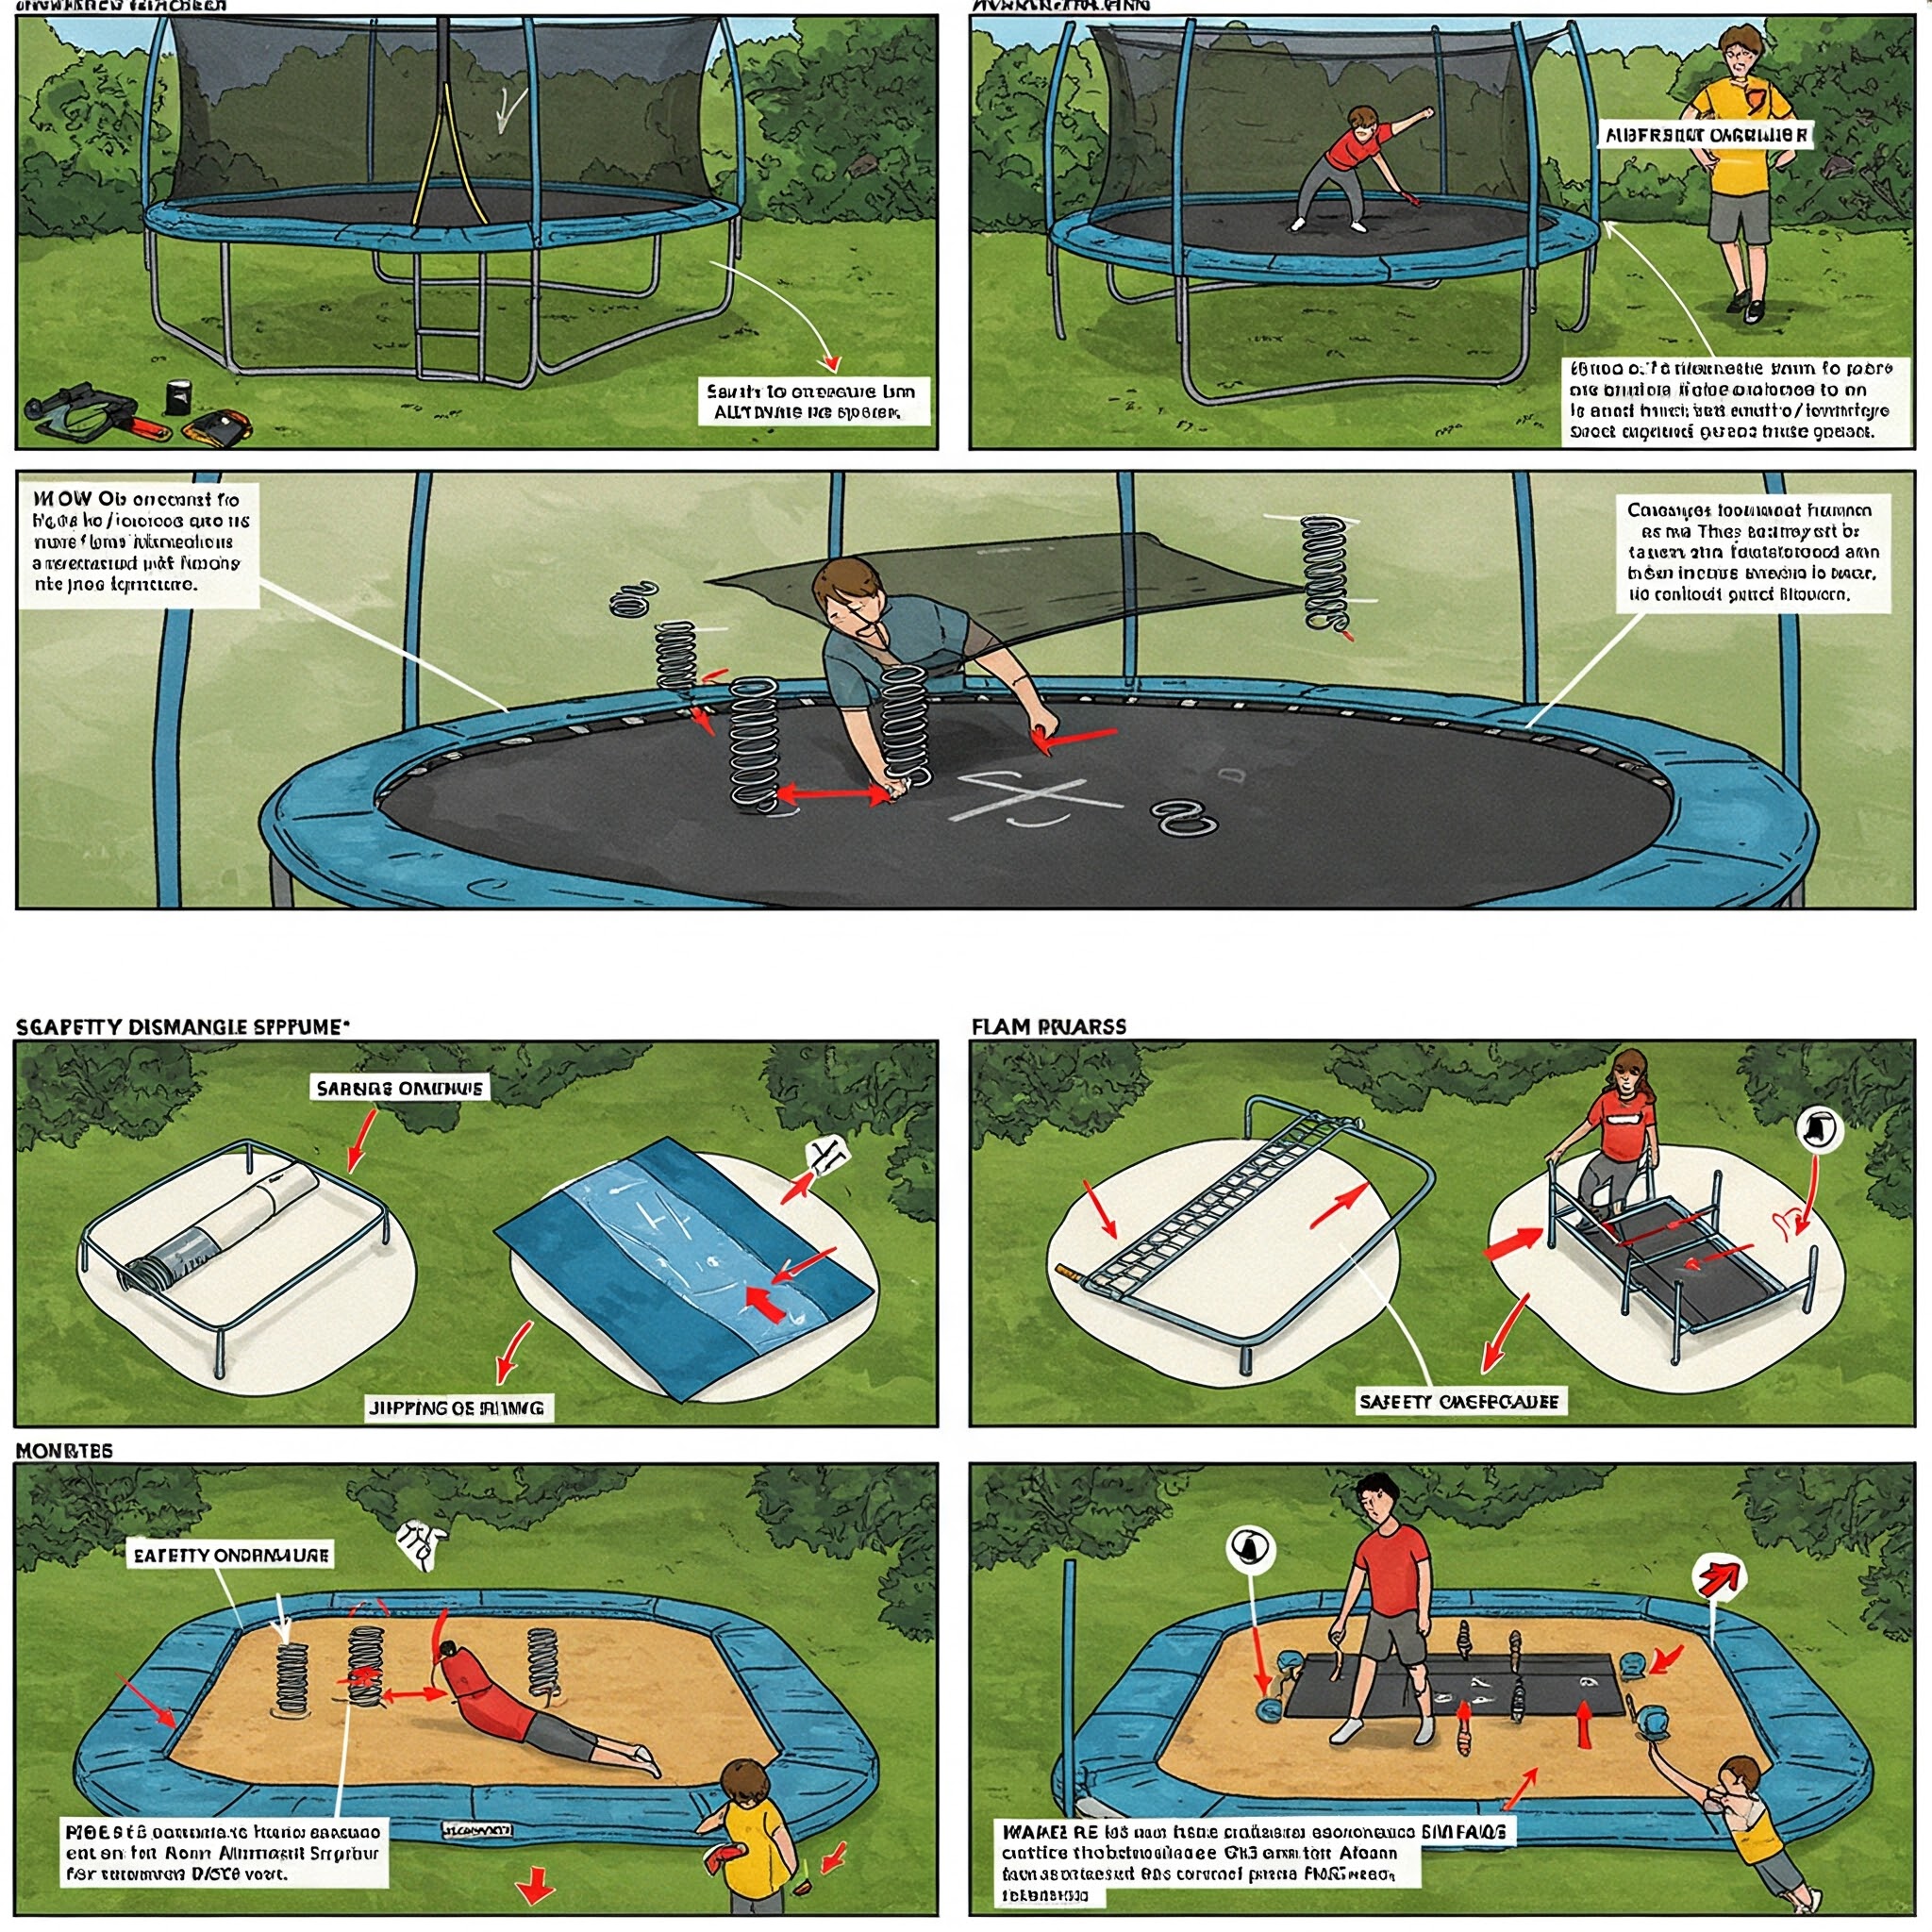
Step 1: Remove Safety Accessories
Begin by removing all accessories attached to your trampoline. This typically includes:
- Safety enclosure net
- Entrance zipper or door
- Padding or edge cover
- Basketball hoops, tents, or other attachments
- Anchor kits if your trampoline is secured to the ground
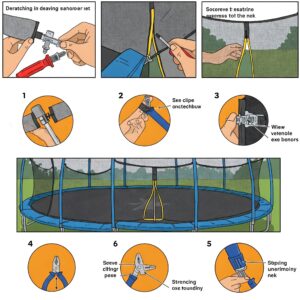
For the enclosure net, carefully unthread it from the poles and detach any connectors. Fold the net neatly to prevent tangling. The TrampoClean Storage Bag is perfect for storing enclosure nets and pads. This waterproof storage solution protects your trampoline accessories from moisture damage, insects, and UV deterioration during storage. The TrampoClean bag features reinforced handles that make transporting heavy trampoline components much more manageable.
When removing the padding or edge cover that protects the springs, unfasten all attachment points completely before attempting to remove it. Forcing a partially attached pad can damage both the pad and the attachment systems.
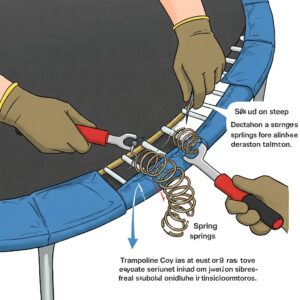
Step 2: Detach the Springs
The springs connect the jumping mat to the frame and are under significant tension. This is where learning how to take apart a trampoline properly becomes crucial for safety.
- Start by removing one spring using your spring tool. Insert the hook end of the tool into the end of the spring attached to the frame.
- Pull the tool toward you to unhook the spring from the frame.
- After removing the first spring, move to the opposite side of the trampoline and remove another spring.
- Continue removing springs in this alternating pattern – this helps maintain even tension on the mat as you work.
- Place all springs in a dedicated container as you remove them.
Remember that the jumping mat will begin to sag as you remove springs. This is normal and makes spring removal progressively easier.
For stubborn springs or older trampolines where rust may be an issue, applying a penetrating lubricant like WD-40 can help ease removal. Always wear gloves during this step as spring ends can be sharp and the tension can cause pinch points.
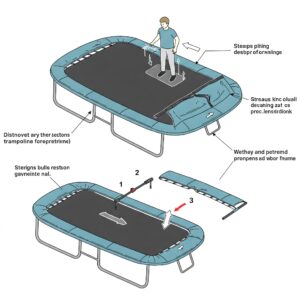
Step 3: Remove the Jumping Mat
Once all springs are removed, the jumping mat should be completely free from the frame. Remove the mat from inside the frame and lay it flat on a clean, dry surface.
If possible, avoid folding the jumping mat with sharp creases, as this can damage the stitching and material over time. Instead, roll the mat loosely. If you need to fold it for storage constraints, make the folds as gentle as possible.
To protect your investment, consider using the JumpMaster Trampoline Mat Protector. This durable protective cover is designed specifically for storing trampoline mats. It prevents damage from UV rays, moisture, and pests during the off-season. The JumpMaster protector includes breathing vents that prevent mold and mildew buildup while maintaining a waterproof barrier.
Step 4: Disassemble the Frame
Now it’s time to learn how to take apart a trampoline frame, which is often the most challenging part of the process:
- Identify the connection points where frame sections join together.
- Remove any screws, bolts, or pins at these connection points.
- Separate the frame sections carefully, keeping track of which pieces connect to each other.
- If your trampoline has legs that attach to the main frame, remove these as well.
For most standard trampolines, the frame disassembles into several curved sections. Label each section with numbered tape or a marker to make reassembly easier. Store all hardware (bolts, nuts, washers) in labeled ziplock bags.
If you encounter severely rusted connections that are difficult to separate, apply penetrating oil and allow it to sit for 15-30 minutes before attempting to loosen the hardware again. Never force connections apart with excessive pressure as this can bend or break the frame components.
Step 5: Dismantle the Enclosure Poles
If your trampoline has a safety enclosure with poles, these should be dismantled last:
- Remove any padding covering the poles.
- Detach the poles from their base connections on the trampoline frame.
- If the poles themselves break down into smaller sections, disassemble these as well.
- Bundle similar pole pieces together and secure with bungee cords or rope.
Some enclosure systems use fiberglass or flexible rods that can snap if bent incorrectly. Handle these with particular care and store them straight to prevent warping.
Special Considerations for Different Trampoline Types
While the general process of how to take apart a trampoline remains similar across models, certain types require special consideration.
How to Dismantle a Springfree Trampoline
Springfree trampolines use a unique design with flexible composite rods instead of traditional springs. The disassembly process differs significantly:
- Remove the mat rod holders (white) from the frame.
- Detach the mat rods from the socket on the mat.
- Remove the mat rods from the frame.
- Disassemble the frame by removing the legs first, then separating the frame sections.
Springfree trampoline assembly and disassembly is generally more complex than standard spring trampolines. The manufacturer provides specialized tools for this process, which I recommend using rather than improvising. The composite rods store significant energy and can cause injury if mishandled.
Due to their unique construction, I recommend reviewing the official Springfree manual before attempting disassembly. Their components are precisely engineered and may require specific sequences for safe removal.
Rectangular and Oval Trampolines
Rectangular and oval trampolines typically have more complex frame structures than round models. When learning how to take apart a trampoline of this shape:
- Pay close attention to how the corner brackets connect different frame segments.
- Document the position of each unique frame piece before disassembly.
- Note that springs may have different tensions at various points around the frame.
- Disassemble in a symmetrical pattern to maintain structural balance until the final stages.
These trampolines often use different spring lengths at corners versus sides, so keeping springs organized by position is important for future reassembly.
In-Ground Trampolines
In-ground trampolines present unique challenges when you need to know how to take apart a trampoline that’s partially buried:
- Start by removing any retaining wall components around the trampoline.
- Follow the standard disassembly procedure for the visible components.
- You may need to excavate around the trampoline to access below-ground frame components.
- Consider whether full disassembly is necessary – sometimes only the mat and springs need replacement.
In-ground trampolines often have drainage systems or specialized anchoring that requires additional care during disassembly. Consult your original installation documentation before proceeding.
✨ Save Time and Protect Your Investment with the Right Tools! ️
:arrow: Looking to make trampoline disassembly quick and painless? The tools I’ve mentioned can save you hours of frustration and protect your investment for years to come. The SpringPro Trampoline Spring Removal Tool, TrampoClean Storage Bag, and JumpMaster Trampoline Mat Protector are all available on Amazon with fast shipping. These quality tools make the difference between a day-long struggle and a smooth 2-hour project!

Proper Storage of Trampoline Components
Once you’ve learned how to take apart a trampoline, proper storage of components is vital for maintaining their condition and extending the lifespan of your investment.
Preparing Components for Storage
Before storing your trampoline parts, ensure they are clean and completely dry to prevent mold, mildew, or rust:
- Clean the mat with mild soap and water, then allow it to dry completely.
- Wipe down metal frame pieces to remove dirt and moisture.
- Check springs for signs of rust – apply a light coating of protective oil if needed.
- Clean enclosure nets to remove dirt, pollen, or organic matter that could cause degradation.
For the frame components, applying a light coat of silicone spray or protective oil to metal connections can prevent rust during storage. Pay special attention to screw holes and connection points where moisture can collect.
Optimal Storage Conditions
The ideal storage environment for trampoline components is:
- Dry and climate-controlled
- Protected from direct sunlight
- Free from pest access
- Away from sharp objects that could puncture or tear the mat or net
- Elevated off the ground (for frame components)
For those without garage or basement storage, consider using the JumpSafe Weatherproof Storage Tote. This heavy-duty container provides complete protection for all your trampoline components. The JumpSafe tote features reinforced corners and a weather-tight seal that prevents moisture infiltration even when stored outdoors. Its stackable design makes efficient use of storage space while keeping components organized.
Organizing Components for Easy Reassembly
Proper organization during storage makes a tremendous difference when it’s time to reassemble:
- Keep all hardware in labeled bags (e.g., “Frame Bolts”, “Net Attachments”).
- Bundle frame sections logically and label with position information.
- Store the instruction manual with the components.
- Keep your disassembly photos accessible for reference.
I recommend creating a simple inventory list of all components before storing them. This allows you to quickly verify that all pieces are present when you’re ready to reassemble.
Common Challenges When Taking Apart a Trampoline
Even when you know how to take apart a trampoline in theory, certain challenges can arise during the process. Here’s how to overcome them:
Dealing with Rust and Corrosion
Outdoor trampolines inevitably experience some level of rust and corrosion, particularly at connection points:
- For light rust, apply penetrating oil and use a wire brush to clean connections.
- For seized bolts, apply penetrating oil, wait 30 minutes, then try again. A gentle tap with a hammer can help break corrosion bonds.
- If bolts are too damaged to remove normally, you may need to use a bolt cutter or reciprocating saw as a last resort.
Prevention is always easier than dealing with severe rust. When reassembling your trampoline, apply anti-corrosion products to hardware and connection points to make future disassembly easier.
Managing Difficult Springs
Springs that have been installed for several seasons can be particularly challenging to remove:
- Use a higher-quality spring tool with better leverage.
- Apply penetrating oil to spring hooks and connection points.
- Try working the spring back and forth gently before attempting removal.
- If a spring is severely deformed or damaged, cutting it may be necessary (while wearing appropriate eye protection).
The PowerGrip Spring Removal System offers superior leverage for even the most stubborn trampoline springs. Its extended handle design provides double the torque of standard spring tools, making it ideal for older trampolines or those with weather-hardened springs. The PowerGrip system includes protective guards that prevent pinched fingers during the high-tension spring removal process.
When to Replace Components
During disassembly, inspect all components for signs that replacement might be necessary:
- Springs that show significant rust, stretching, or deformation
- Frame sections with bent tubing or severe rust penetration
- Mats with tears, significant UV degradation, or damaged stitching
- Enclosure nets with large holes or deteriorated fabric
Taking apart your trampoline provides the perfect opportunity to assess component condition. If you’re storing for an extended period, order replacement parts ahead of reassembly time.
How to Dismantle a Trampoline for Different Purposes
The approach to taking apart a trampoline might vary slightly depending on your specific purpose.
Seasonal Storage
When dismantling for winter or off-season storage:
- Follow the complete disassembly process detailed above.
- Focus on thorough cleaning before storage to prevent degradation.
- Consider using specialized covers if you’re leaving the frame assembled but removing the mat and springs.
- Store smaller components indoors if possible, even if the frame remains outside.
In regions with harsh winters, complete disassembly is recommended to prevent damage from snow load, ice, and freeze-thaw cycles. However, in milder climates, you might opt to remove only the mat, springs, and enclosure while leaving the frame assembled and secured.
Moving to a New Location
When taking apart a trampoline for relocation:
- Be especially meticulous about labeling and organizing components.
- Take additional photos specifically of connection mechanisms and hardware orientation.
- Keep all components together during the move to prevent loss.
- Consider measuring your new location before disassembly to confirm fit.
If you’re moving to a new home, create a dedicated “trampoline box” for all smaller components and hardware. This prevents these crucial items from becoming lost among other moving boxes.
Temporary Disassembly for Landscaping or Yard Work
Sometimes you need to know how to take apart a trampoline temporarily for yard maintenance:
- You may only need to remove the mat and springs, leaving the frame in place.
- Use a consistent pattern for spring removal to make reassembly easier.
- Store components away from landscaping chemicals or equipment that could cause damage.
- Complete the project and reassemble the trampoline as quickly as possible to reduce the risk of lost components.
For very short-term needs (like accessing underneath the trampoline), consider whether simply moving the fully assembled trampoline is possible with sufficient help, rather than disassembling it.
Springfree Trampoline Assembly: A Special Case
While most of this guide focuses on how to take apart a trampoline, understanding assembly is equally important – especially for unique systems like Springfree trampolines.
Understanding Springfree Technology
Springfree trampolines use a fundamentally different design than traditional spring trampolines:
- They utilize flexible composite rods beneath the jumping surface instead of exposed springs.
- The frame sits below the jumping surface, eliminating the impact zone.
- The enclosure uses flexible support rods integrated into the mat system.
This unique design creates special considerations for both assembly and disassembly. The tension in the composite rods is substantial and requires careful handling during both processes.
Key Differences in Springfree Disassembly
When taking apart a Springfree trampoline:
- Begin by releasing tension from the composite rods in a specific sequence (typically detailed in the manufacturer’s manual).
- Use the specialized tools provided by Springfree for rod removal.
- Take extra precautions with the flexible rods, as they store significant energy.
- Label components more extensively, as Springfree systems have more unique parts than traditional trampolines.
The disassembly process for Springfree trampolines is more technical and typically requires at least two people. I strongly recommend reviewing Springfree’s official videos before attempting disassembly for the first time.
When to Contact Professional Help
While most trampoline owners can successfully take apart a trampoline on their own, there are situations where professional help is advisable:
- If your trampoline is a specialized commercial model
- If significant rust or damage makes standard disassembly dangerous
- If you have physical limitations that make the process unsafe
- If you’re dealing with a built-in or custom installation
Many trampoline retailers offer disassembly services for a reasonable fee. This can be particularly valuable for Springfree trampoline assembly and disassembly, which requires specific techniques and tools.
Maintenance Tips During Disassembly
The process of taking apart a trampoline provides an excellent opportunity for maintenance that can extend the life of your equipment.
Inspection Checklist
As you disassemble each component, inspect for:
- Frame: Cracks, bent sections, severe rust, failing welds
- Springs: Stretching, breakage, severe rust, deformation
- Mat: Tears, UV degradation, damaged stitching, worn attachment points
- Padding: Compression, tears, water damage, failed attachment points
- Enclosure: Holes, UV breakdown, damaged seams, bent poles
Document any issues you find so you can address them before reassembly. Taking photos of damaged areas helps when ordering replacement parts.
Cleaning and Treatment
While components are disassembled:
- Clean the mat with mild soap and water, rinse thoroughly, and allow to dry completely.
- Remove rust from frame components using a wire brush, then apply rust inhibitor.
- Clean padding and enclosure nets according to manufacturer recommendations.
- Apply protective lubricant to all hardware and connection points.
For metal components, products like FrameGuard Trampoline Protectant offer specialized protection against rust and corrosion. This spray-on formula creates a moisture-resistant barrier that significantly extends the life of metal trampoline components. The FrameGuard protectant is particularly effective for trampolines stored in humid climates or coastal areas where salt air accelerates corrosion.
Replacement Part Considerations
As you learn how to take apart a trampoline and inspect components, make note of parts that may need replacement:
- Springs typically need replacement every 2-5 years depending on usage and climate.
- Mats usually last 5-8 years before UV damage compromises structural integrity.
- Safety pads often deteriorate faster than other components and may need replacement every 2-4 years.
- Enclosure nets can last 3-6 years depending on sun exposure and climate.
Ordering replacement parts during the off-season often yields better prices, and ensures you have everything needed when it’s time for reassembly.
Expert Tips for Easier Trampoline Disassembly
After taking apart numerous trampolines over the years, I’ve developed several techniques that make the process smoother and more efficient.
Time-Saving Techniques
- Use two spring tools simultaneously – one in each hand – to double your spring removal speed.
- Keep a partner on the opposite side of the trampoline removing springs in tandem for even tension reduction.
- Use colored electrical tape to create a simple color-coding system for frame parts.
- Pre-organize your storage space before beginning disassembly.
- Use a small portable table near the trampoline to organize tools and removed components.
For frames with many similar-looking parts, consider creating a simple numbered diagram before disassembly, then attaching matching numbered tags to each component.
Tool Hacks for Easier Disassembly
- If you don’t have a dedicated spring tool, a strong carabiner can work as a temporary alternative.
- Stubborn bolts can often be loosened by applying candle wax to the threads after cleaning.
- Use pool noodles sliced lengthwise to protect and organize frame tubes during storage.
- A tennis ball with a slit cut into it makes a safe cover for exposed bolt ends during disassembly.
- Bicycle chain lubricant works exceptionally well for protecting frame connections during storage.
The MultiMaster Trampoline Tool Kit combines all the specialized tools needed for trampoline maintenance in one package. This comprehensive kit includes a professional-grade spring tool, frame alignment tools, and hardware organizers that make the entire process significantly more manageable. The MultiMaster kit even includes specialized cleaning tools designed specifically for trampoline components.
Safety Shortcuts (Without Compromising Quality)
Some shortcuts can save time without risking component damage:
- Leave enclosure poles connected to their bases if they’ll be stored as a unit.
- For temporary disassembly, remove springs in groups of 3-4 (skipping several in between), then go back for the remainder once tension is reduced.
- Use a cordless drill with the appropriate socket attachment for faster bolt removal (use low torque to prevent damage).
- Pre-position storage containers strategically around the trampoline to minimize walking distance during disassembly.
Remember that while efficiency is valuable, rushing can lead to damaged components or safety risks. The goal is working smarter, not necessarily faster.
✨ Make Your Next Trampoline Disassembly Hassle-Free!
–> After reading this guide, you now know how to take apart a trampoline like a pro. Don’t struggle with makeshift tools or risk damaging your investment! The SpringPro Trampoline Spring Removal Tool, TrampoClean Storage Bag, and JumpMaster Trampoline Mat Protector are trusted by thousands of trampoline owners nationwide. These affordable products make disassembly quick, safe, and stress-free. Check them out on Amazon today to make your next disassembly project simple!

Troubleshooting Common Issues
Even with preparation, you may encounter challenges when learning how to take apart a trampoline. Here are solutions to common problems:
Stuck or Seized Components
If frame sections won’t separate:
- Apply penetrating oil to all connection points and let sit for 30-60 minutes.
- Use rubber mallets rather than metal hammers to avoid damaging components.
- Try rotating sections while pulling apart to break corrosion bonds.
- For severely seized connections, applying controlled heat with a hairdryer can help expand metal and break rust bonds.
Lost or Missing Hardware
If you discover missing hardware during disassembly:
- Search the ground beneath and around the trampoline thoroughly.
- Check if hardware is still attached to other components.
- Measure any similar hardware to identify appropriate replacements.
- Contact the manufacturer for exact specifications if possible.
Hardware replacement kits like the TrampoFix Universal Hardware Set are invaluable resources if you discover missing components during disassembly. This comprehensive kit includes the most commonly needed bolts, nuts, and washers in various sizes to match virtually any trampoline brand. The TrampoFix set includes a convenient size chart to help identify the exact replacement parts you need.
Damaged Springs or Mat
If you discover damage during disassembly:
- For minor mat tears, note their location for future repair before storage.
- For severely damaged mats, consider ordering a replacement before storage.
- Count damaged springs and order replacements based on your trampoline size and model.
- For bent frame components, determine if straightening is possible or if replacement is necessary.
✨ Protect Your Investment With Professional-Grade Tools! ️
–> Ready to disassemble your trampoline like a pro? The specialized tools mentioned throughout this article make all the difference! The SpringPro Tool, TrampoClean Storage Bag, JumpMaster Mat Protector, and FrameGuard Protectant are all available with fast Amazon delivery. These affordable products have helped thousands of trampoline owners protect their investments and make maintenance simple. Click on any highlighted product to check current pricing and availability!

Conclusion
Learning how to take apart a trampoline properly is an essential skill for any trampoline owner. By following the systematic approach outlined in this guide, you can disassemble your trampoline safely and efficiently while preserving its components for years of continued use.
Remember that proper disassembly is as important as correct assembly. Taking shortcuts during this process can lead to damaged components, lost parts, and potentially unsafe conditions when the trampoline is reassembled. Invest the time to do it right, and your trampoline will provide many more seasons of enjoyment.
The key takeaways from this guide include:
- Prepare properly with the right tools and workspace
- Document the assembled trampoline before starting
- Follow a systematic disassembly sequence
- Store components properly to prevent degradation
- Use the disassembly process as an opportunity for maintenance
- Consider the specific requirements of your trampoline type
Whether you’re storing for the season, moving to a new home, or simply relocating your trampoline within your yard, these guidelines for how to take apart a trampoline will help ensure the process goes smoothly and your equipment remains in excellent condition.
More FAQs
❓ How long does it take to disassemble a standard trampoline?
✅ Dismantling a standard round trampoline typically takes 1-2 hours with two people working together. Larger models or those with complex enclosures may require 2-3 hours. First-time disassembly usually takes longer than subsequent times. Having the proper tools like a dedicated spring removal tool can significantly reduce the time needed...
❓ Can I take apart a trampoline by myself or do I need help?
✅ While technically possible, disassembling a trampoline alone is not recommended for safety reasons. You'll need at least one helper for managing large frame pieces, maintaining balanced tension during spring removal, and safely handling heavy components. Solo disassembly increases the risk of injury and component damage...
❓ What's the best way to store trampoline springs to prevent rust?
✅ Store trampoline springs in a sealed plastic container with moisture absorbing silica packets. Before storage, clean springs with a mild detergent, dry thoroughly, and apply a light coat of silicone spray or WD-40. Keep the container in a climate-controlled environment away from humidity. Never store springs outside or in damp locations...
❓ How do you disassemble a trampoline with rusted bolts and connections?
✅ For rusted connections, apply a penetrating oil like WD-40 or PB Blaster to all hardware and let sit for 30-60 minutes. Use a wire brush to clean accessible rust before attempting to loosen bolts. For severely seized bolts, apply additional penetrating oil and tap gently with a hammer to break rust bonds. As a last resort, cutting tools may be necessary...
❓ What's the difference between disassembling a springfree trampoline vs. a regular trampoline?
✅ Springfree trampoline disassembly differs significantly from traditional models. Instead of metal springs, they use flexible composite rods that require a specific sequence for safe removal. The frame sits beneath the jumping surface rather than around it, and specialized tools are necessary. Springfree disassembly typically takes 2-4 hours and requires strictly following manufacturer instructions...
Recommended for You:
- 10 Brilliant Ways Can You Recycle Material From Trampoline – Sustainable Upcycling Guide 2025
- 10 Best Acon Trampolines For Ultimate Backyard Entertainment in 2025
- 10 Best Skybound Trampoline Models for Epic Backyard Fun in 2025
Disclaimer: This article contains affiliate links. If you purchase products through these links, we may earn a small commission at no additional cost to you.
✨ Found this helpful? Share it with your friends!